A stained, sagging ceiling from a leak is never just a small cosmetic issue. Learning how to repair a water-damaged ceiling starts with treating that stain as a true emergency.
Left alone, water moves into drywall, insulation, and wood, and mold can appear in as little as one to two days.
To repair a water-damaged ceiling the right way, you stop the leak, protect the area, dry the structure, look for mold, then patch or replace damaged drywall and repaint with a stain-blocking primer. This step-by-step guide explains each stage, shows when a careful homeowner can handle the job, and points out the moments when a professional like Scavello Restoration is the safer choice.
Keep reading to turn a stressful ceiling leak into a clear, manageable plan of action.
Key Takeaways
These quick points give a fast overview before you read the full repair guide.
Act within the first 24 to 48 hours after you spot ceiling water damage. Fast action limits mold, keeps framing stronger, and usually keeps repair costs lower.
Fix the leak source before touching the ceiling itself. Then verify the ceiling is truly dry with a moisture meter, not just by feel, before any patching or painting.
Call a professional when things look risky: visible mold, sagging ceilings, electrical involvement, sewage, or hidden leak sources. Scavello Restoration offers 60-minute emergency response across much of southeastern Pennsylvania.
Warning Signs Of Ceiling Water Damage You Should Never Ignore
Warning signs of ceiling water damage include stains, peeling paint, sagging sections, mold spots, and musty odors. These early clues show that water already reached hidden ceiling materials and may still be spreading. According to the National Flood Insurance Program, water damage is one of the most common and costly home disasters in the United States, affecting roughly 1 in 50 insured homes each year.
Catching these signs early matters because mold can start on damp drywall in a short time. The U.S. Environmental Protection Agency explains that mold can grow within 24 to 48 hours on wet materials that stay damp (EPA). That means even a small stain needs fast attention, not a wait-and-see approach.
“An ounce of prevention is worth a pound of cure.” — Benjamin Franklin
Here are warning signs that deserve quick action:
Water stains and rings often look yellow, brown, or rust colored on white paint. They show that water already moved through the drywall surface and left mineral deposits behind, which means moisture once pooled above that point. If the stain grows or darkens, active moisture is likely still present.
Peeling, bubbling, or flaking paint tells you moisture sits just beneath the surface. As drywall swells and dries again, paint loses its grip and starts to blister. When paint bubbles, there is usually soft drywall under that spot, not a simple cosmetic issue.
Sagging or bowed areas in the ceiling show that drywall took on a lot of water weight. A sagging panel can give way without warning if water keeps collecting above it. Any ceiling that droops, especially near a light fixture, calls for fast inspection and possible support before anyone walks below it.
Mold spots and musty odors often appear in corners or along seams. You may see black, green, or gray specks, or only smell a persistent earthy odor. According to the Centers for Disease Control and Prevention, mold exposure can trigger asthma and allergy symptoms for many people (CDC). Odor without a visible source often means moisture and possible mold inside the ceiling cavity. The CDC estimates that approximately 21% of asthma cases in the United States may be attributable to dampness and mold exposure in homes.
Leak location also gives a hint about the cause. Stains on top floors often connect to roof problems, while stains below bathrooms, laundry rooms, or kitchens usually mean plumbing or appliance leaks overhead.
How To Find And Stop The Source Of A Ceiling Leak
Finding and stopping the source of a ceiling leak comes before any ceiling repair. Until the leak ends completely, every patch or paint job will fail again.
Start with safety and quick containment. Put a bucket or large container under the drip and move furniture out of the way. If water gathers around a light fixture, shut off power to that circuit at the breaker panel right away and avoid touching the fixture. For badly bulging areas, a small controlled hole at the lowest point can let trapped water drain and reduce the chance of a sudden ceiling collapse.
To keep this under control:
Move rugs, electronics, and valuables out of the wet area.
Lay down plastic or old towels to catch splashes.
Take quick photos or short videos for a possible insurance claim.
Next, start tracking the leak. Use a pencil or chalk to outline the wet or stained area and note if it grows over time. A nearly round outline often means the leak sits close to the center of the stain, while a long, thin stain usually points back toward a pipe, wall, or roof valley at the narrow end.
Simple tools help you narrow things down. A pin-type moisture meter pressed against different spots on the ceiling and nearby walls shows where moisture levels are highest. You can also tape tissue or paper towels along pipes and joists above the stain; even a slow drip will show up as a wet mark on the paper.
Here are the most common leak sources and how people usually deal with them:
Plumbing lines and fixtures above the ceiling cause many leaks near bathrooms, laundry rooms, and kitchens. Loose supply lines under sinks, worn caulk around tubs, cracked toilet flanges, and damaged drain traps are common culprits. Shut off the water, repair or replace worn parts, and test carefully before closing the ceiling again.
Roof and gutter problems often cause stains on upper-floor ceilings or near exterior walls. Missing or curled shingles, cracked flashing near chimneys or vents, and clogged gutters that overflow toward the house can all send water into the structure. After storms or snow, inspect the roof and gutters or call a roofing specialist to correct visible issues. Industry surveys indicate that roof and flashing failures account for approximately 35% of all residential water intrusion problems reported by home inspectors.
Appliances and condensation can also feed leaks. Dishwashers, washing machines, and refrigerators with ice makers all have supply and drain lines that can fail, and research on the loss rule of leakage problems in residential construction confirms that plumbing-related failures are among the leading drivers of recurring ceiling water damage. Poor ventilation in bathrooms or laundry rooms can create heavy condensation that drips onto ceilings. According to the Insurance Information Institute, water damage and freezing rank among the most common causes of home insurance claims in the United States (Insurance Information Institute). Good exhaust fans and regular hose checks reduce this risk.
For homes with fire sprinklers, damaged or corroded heads may leak slowly. The National Fire Protection Association notes that sprinkler systems require periodic inspection and testing to stay reliable (National Fire Protection Association). If you suspect a sprinkler line, call a licensed fire protection or plumbing contractor.
Remember, any wiring that sat under water for more than 24 hours needs evaluation from a licensed electrician before you restore power to that area.
How To Repair A Water-Damaged Ceiling Step By Step
Repairing a water-damaged ceiling starts only after the leak source is fixed and the structure is dry. From there, the repair plan depends on how severe the damage is, from light stains to full drywall replacement.
Home repair cost estimates from services such as HomeAdvisor suggest that professional water damage repairs can run around 45 to 55 dollars per square foot for serious ceiling work, and the average homeowner spends between $1,100 and $3,200 on ceiling water damage repairs depending on the scope. Careful assessment helps you decide when a do-it-yourself repair feels reasonable and when calling Scavello Restoration saves time, stress, and long-term cost.
Step 1–2: Dry Completely And Assess The Damage
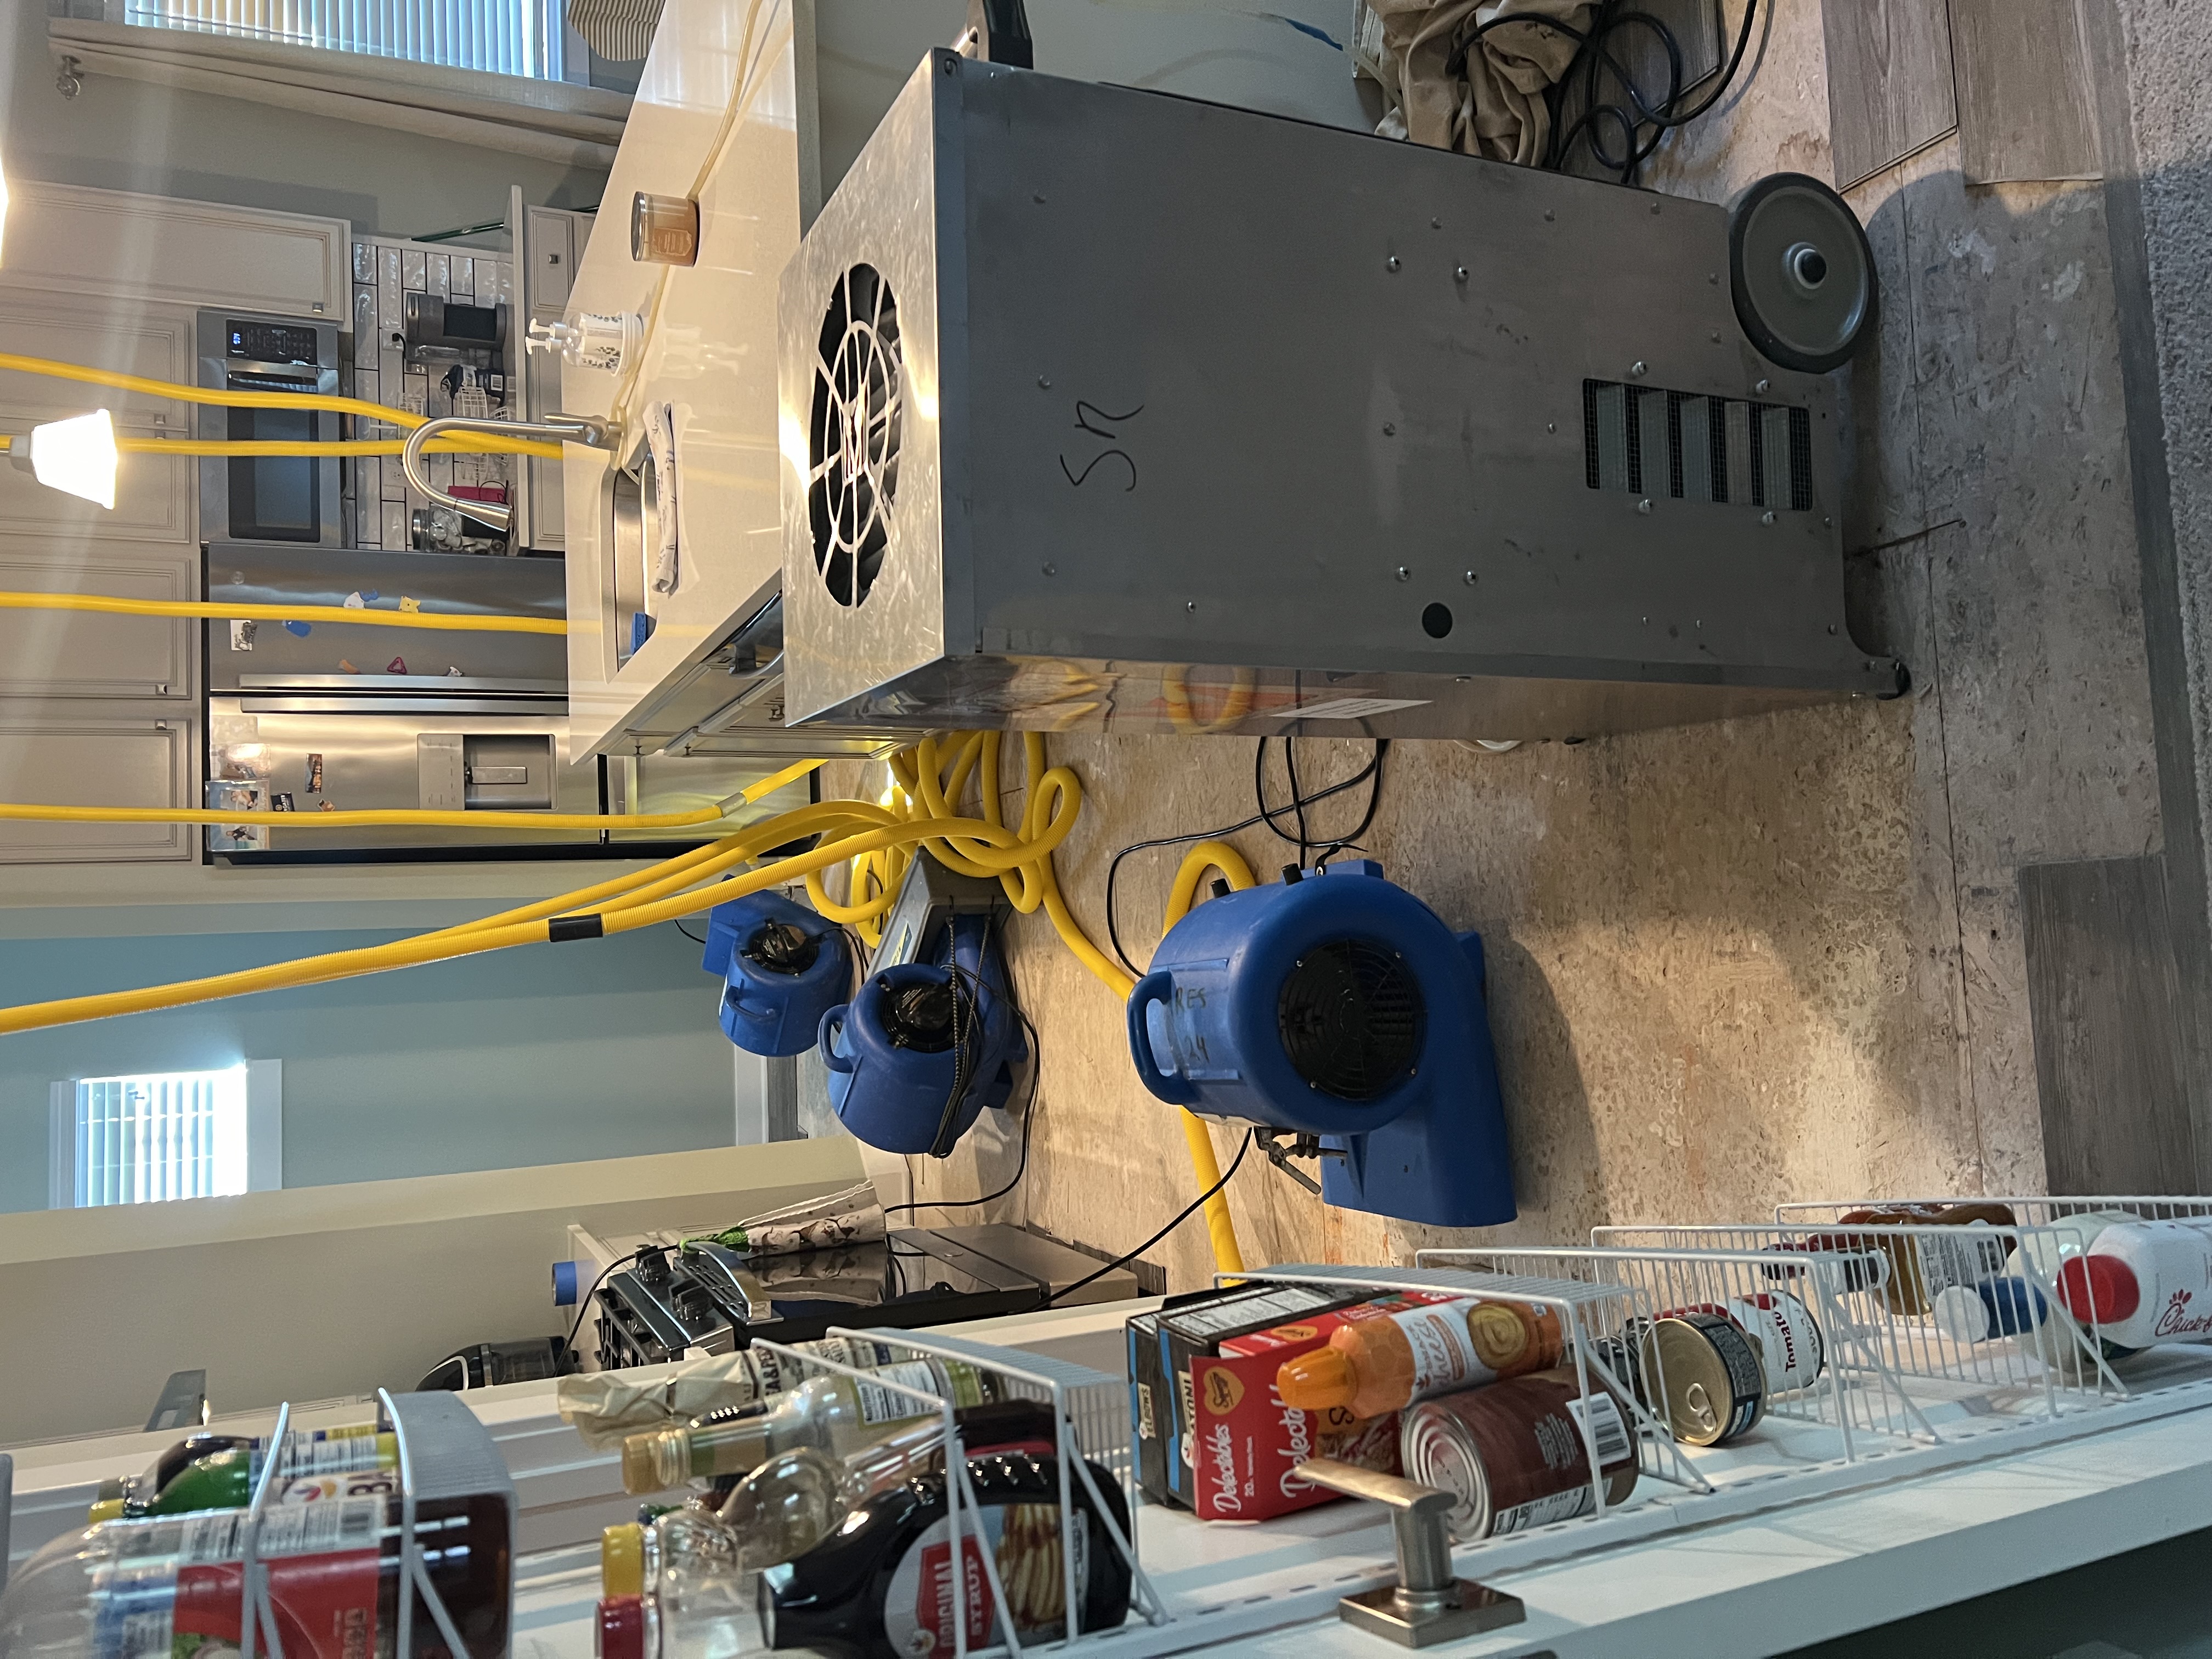
Drying the ceiling area completely is the first non-negotiable step. Box fans alone rarely pull enough moisture from drywall, insulation, and framing. Restoration companies like Scavello Restoration use high-velocity air movers and industrial dehumidifiers to pull moisture out of building materials and the air until readings reach safe levels. Professional drying equipment can remove up to 30 gallons of water per day from a single room, compared to roughly 1 to 2 gallons per day for a standard household fan.
Use a moisture meter to confirm that drywall, joists, and insulation are back to normal moisture content before any repair, as aging-dependent repair performance and interfacial durability research shows that residual moisture significantly undermines waterproof membrane adhesion and long-term repair quality. Do not rely on touch; materials can feel dry on the surface while still wet inside. According to the Institute of Inspection Cleaning and Restoration Certification, proper structural drying greatly reduces later mold growth and secondary damage (IICRC).
Once dry, place the ceiling into one of three groups:
Minor damage means light staining with firm, solid drywall.
Moderate damage includes small soft spots or localized holes where drywall lost strength.
Severe damage includes large sagging sections, crumbled drywall, or areas that already fell, which usually need full sheet replacement.
A quick comparison can help you decide what you are looking at:
| Damage Level | What You See | Typical Approach |
|---|---|---|
| Minor | Small stain, no sagging, drywall feels solid | Clean, prime with stain blocker, repaint |
| Moderate | Soft area, small hole, limited sagging | Cut out bad area, patch with joint compound or small drywall piece |
| Severe | Large sagging, crumbling, sections missing | Remove full sections, replace drywall and insulation |
Step 3–6: Treat For Mold, Then Patch Or Replace
Before any paint or patch work, check carefully for mold on and behind the ceiling. Small specks on a limited area of painted surface may be manageable with a household antimicrobial cleaner, gloves, eye protection, and an N95 mask. However, if mold covers more than about ten square feet, the EPA advises using a qualified mold remediation contractor (EPA), which is a core service Scavello Restoration provides. Studies show that untreated mold can reduce indoor air quality significantly and may cause property values to drop by 10% or more when discovered during a home sale.
Once you are sure mold is either absent or properly handled, follow this repair sequence:
For minor stains on solid drywall, clean the area gently and let it dry. Then apply a stain-blocking primer directly over the stained section and slightly beyond the edges. Standard ceiling paint alone will not hold back a water mark, even after several coats, because the stain pigments bleed through. After the primer dries fully, apply one or two coats of matching ceiling paint.
For small holes or shallow soft spots, cut out loose material until you reach firm drywall edges. Fill the area with joint compound in thin layers, letting each layer dry and sanding lightly between coats. Feather the compound wider than the hole so the patch blends with the surrounding surface. When smooth, prime the area with a stain-blocking primer and finish with matching paint.
For large damaged areas, you usually need a helper. Use a drywall saw to cut away all wet, crumbling, or soft drywall and remove any wet insulation above. Square up the opening and cut back to the nearest ceiling joists so every edge has solid backing. If needed, screw 2×4 nailer boards to existing joists to create firm edges for the new panel.
Install the replacement drywall, matching the thickness of the existing ceiling, often one half inch. With a helper, lift the panel into place and secure it to joists and nailer boards with drywall screws spaced about eight inches apart. Apply drywall tape over seams, then add at least three thin coats of joint compound, feathering wider each time and sanding between coats. When the surface looks smooth and level with the rest of the ceiling, prime and paint the entire repaired section.
Never skip the stain-blocking primer step – water stains will bleed through standard ceiling paint even after years. Shellac-based primers are the most reliable option for stubborn water staining.
If at any point you feel unsure about mold, structural strength, or matching the finish, it is wise to stop and consult Scavello Restoration for a professional assessment.
When To Call A Professional Ceiling Repair Company Like Scavello Restoration
Some ceiling water damage repairs stay manageable for an experienced homeowner, but many situations call for a professional. You should bring in a restoration company when safety, health, or structural concerns go beyond simple patch work.
Professional help also protects your insurance claim. According to the Insurance Information Institute, water damage and freezing issues are responsible for billions of dollars in insured home losses each year, with the average water damage claim totaling approximately $11,000 (Insurance Information Institute). Accurate documentation and proper drying help claims move faster and reduce the chance of denied coverage later.
Here are signs that a company like Scavello Restoration should step in:
Large areas of sagging or collapsed ceiling point to structural concerns. Heavy, soaked drywall can pull away from joists, and the weight can weaken framing. A professional can shore up the area, check joists, and rebuild safely so the ceiling does not fail again.
Visible mold or a strong musty odor across a broad area suggests a bigger contamination problem. Mold spores spread easily when disturbed, which is why IICRC-standard containment and HEPA filtration matter. Scavello Restoration pairs water damage repair with mold remediation so both causes and symptoms receive proper treatment.
Any water near electrical wiring, junction boxes, or recessed lights calls for expert help. A licensed electrician should evaluate affected circuits before power returns. Scavello Restoration often coordinates this step as part of a full restoration plan so you do not juggle several contractors.
Category 3 water, sometimes called black water, includes sewage backups, toilet overflows with waste, and outdoor floodwater. The IICRC classifies this water as a health hazard that needs full protective gear, antimicrobial treatment, and strict disposal rules. For these events, Scavello Restoration’s trained team handles both cleanup and the ceiling repair that follows.
When the leak source stays unclear after basic checks, advanced moisture detection can save time and money. Restoration technicians use meters, thermal cameras, and building experience to find hidden paths of water. That reduces guesswork and unnecessary demolition.
Scavello Restoration offers 60-minute emergency response, day or night, across communities like Pottstown, Collegeville, Phoenixville, Royersford, and King of Prussia. Their IICRC-certified team manages the full process from emergency water extraction and structural drying to drywall replacement, painting, and coordination with your insurance adjuster. In fact, homeowners who contact a certified restoration company within 24 hours of discovering a leak reduce their total repair costs by an estimated 40% compared to those who delay action by 72 hours or more.
Scavello Restoration’s single-team model means no scheduling gaps between mitigation and reconstruction. One call starts the entire process, from emergency water extraction through finished ceiling repair.
Lấy Kết Quả (Conclusion)
Ceiling leaks move fast, turning a small stain into a major repair in only a few days. Responding within 24 to 48 hours, fixing the leak at its source, and confirming true dryness protect your home more than any clever paint trick.
Lasting repair comes from three simple ideas: stop the water, dry the structure with verified readings, and rebuild with proper materials and stain-blocking primer. For homeowners in southeastern Pennsylvania, Scavello Restoration adds fast response, full-service repair, and direct work with your insurance company.
If you are in Pottstown, Collegeville, Phoenixville, Royersford, King of Prussia, or nearby communities and see a new ceiling stain, call Scavello Restoration any time, day or night, to protect your property while the problem stays small.
Frequently Asked Questions
Question 1: How Long Does It Take For A Water-Damaged Ceiling To Dry Completely Before Repairs Can Begin?
Drying a water-damaged ceiling usually takes two to five days. Time depends on how much water entered, ceiling materials, and airflow. Industrial air movers and dehumidifiers used by companies like Scavello Restoration speed this process. Always confirm dryness with a moisture meter before repairs.
Question 2: Can I Paint Over A Water Stain On My Ceiling Without Replacing The Drywall?
Yes, you can paint over a water stain if the drywall feels solid and moisture readings look normal. Clean the area, then apply a stain-blocking primer, ideally shellac based. After it dries, add matching ceiling paint. Skipping the primer almost always lets the stain reappear.
Question 3: Does Homeowners Insurance Cover Water-Damaged Ceiling Repairs?
Homeowners insurance often covers sudden, accidental events such as burst pipes or appliance failures. Long-term leaks from lack of maintenance are usually excluded. Detailed documentation from a restoration contractor, including photos and moisture readings, helps support the claim. Scavello Restoration works directly with many insurers and offers billing help.
Question 4: How Do I Know If My Ceiling Water Damage Has Mold?
Ceiling mold often appears as black, green, or gray specks near stains or corners. A stubborn musty odor that returns after surface cleaning also suggests mold. Because mold can hide inside ceiling cavities, a professional inspection or air testing may be needed when you are unsure.
Question 5: What Is Category 3 Water Damage, And Why Does It Require A Professional?
Category 3 water damage involves sewage, toilet overflows with waste, or outside floodwater. This water carries bacteria, viruses, and other harmful contaminants. Handling it without proper training and protective gear is risky. IICRC-certified contractors like Scavello Restoration follow strict cleaning, drying, and disposal steps to protect both health and structure.